kustomize
kustomize 可以方便我们为多种目的来定制底层、任意模版的YAML文件,并保持原始YAML文件不需修改。 kustomize 是面向kubernetes的工具,它能够理解并且patch kubernetes风格 API对象。类似 make ,kustomize在文件中申明工作,并且也类似 sed ,可以编辑文本。
安装
二进制安装
macOS平台,可以通过Hinebrew包管理器安装(我没有使用这个方法):
brew install kustomize
备注
使用 brew 安装的kustomize执行时报错 zsh: exec format error: kustomize ,所以我安装官方安装文档,采用官方仓库下载二进制可执行文件。
在windows平台,可以通过 Chocolatey 包管理器安装(我没有windows,尚未实践):
choco install kustomize
全系列各平台都可以使用都安装方法是直接从 kustomize 官方release 下载,推荐采用官方安装脚本安装:
kustomize¶curl -s "https://raw.githubusercontent.com/kubernetes-sigs/kustomize/master/hack/install_kustomize.sh" | bash
也可以通过Go v.10.1 或更高版本安装:
go get sigs.k8s.io/kustomize
备注
从 1.14 版本开始,kubectl已经支持使用kustomization文件来管理Kubernetes对象,所以不再需要单独安装kustomize,可以直接 安装和设置kubectl 来实现相同功能。
源代码安装
不clone代码仓库方式从源代码安装kustomize
备注
在 Asahi Linux ( Arch Linux )上验证
对于(go版本>= 1.17):
GOBIN=$(pwd)/ GO111MODULE=on go install sigs.k8s.io/kustomize/kustomize/v4@latest
完成后,二进制执行文件 kustomize 位于当前目录下
clone代码仓库方式从源代码安装kustomize
备注
在 Fedora 上验证
执行以下编译安装步骤:
# Need go 1.13 or higher
unset GOPATH
# see https://golang.org/doc/go1.13#modules
unset GO111MODULES

# clone the repo
git clone git@github.com:kubernetes-sigs/kustomize.git
# get into the repo root
cd kustomize

# Optionally checkout a particular tag if you don't
# want to build at head
git checkout kustomize/v4.5.2

# build the binary
(cd kustomize; go install .)

# run it
~/go/bin/kustomize version
创建base
备注
主要通过 kustomize examples 学习
kustomize中, base 是需要通过 overlay 修订的基础配置,这部分是类似 Docker 镜像的只读层,通常不做修改。
overlay 提供针对 base 修改的配置部分,覆盖相同的配置项部分,提供不同的配置值。
建立base
案例是使用 hello ,一个简单的web服务器,提供配置用于实现一些配置验证。
备注
在实验之前,请先 minikube 和 安装和设置kubectl ,准备好测试环境。
下载案例helloworld:
DEMO_HOME=~/hello
BASE=$DEMO_HOME/base
mkdir -p $BASE
curl -s -o "$BASE/#1.yaml" "https://raw.githubusercontent.com\
/kubernetes-sigs/kustomize\
/master/examples/helloWorld\
/{configMap,deployment,kustomization,service}.yaml"
此时目录结构:
~/hello
 └── base
     ├── configMap.yaml
     ├── deployment.yaml
     ├── kustomization.yaml
     └── service.yaml
参考 Using Kubectl’s new Kustomize support for per-environment deployment of cert-manager resources 可以采用如下方法验证 kustomize 配置:
kustomize build $DEMO_HOME/base
此时会完整合并各个yaml配置,验证语法,合并成最终的配置。以上命令也可以等同采用 kubectl kustomize base 。
执行完成部署,该用如下命令方法:
kustomize build $DEMO_HOME/base | kubectl apply -f -
最新kubectl 1.14集成了kustomize功能,也可以采用:
kubectl apply -k $DEMO_HOME/base
可能需要修改 base/kustomization.yaml 开头添加以下行( 参考 require apiVersion/kind in Kustomization.yaml? #738 ):
apiVersion: kustomize.config.k8s.io/v1beta1
kind: Kustomization
备注
配置可参考 kustomization.yaml案例
存在报错:
onfigmap/the-map configured
service/the-service configured
The Deployment "the-deployment" is invalid: spec.selector: Invalid value: v1.LabelSelector{MatchLabels:map[string]string{"app":"hello"}, MatchExpressions:[]v1.LabelSelectorRequirement(nil)}: field is immutable (字段是不可改变的)
检查 service.yaml 中设置了:
spec:
  selector:
      deployment: hello
和 kustomization.yaml 中设置:
commonLabels:
  app: hello
是否冲突?我修改 kustomization.yaml 注释掉 commonLabels
#commonLabels:
#  app: hello
则执行报错:
configmap/the-map unchanged
service/the-service unchanged
error: error validating "STDIN": error validating data: ValidationError(Deployment.spec): missing required field "selector" in io.k8s.api.apps.v1.DeploymentSpec; if you choose to ignore these errors, turn validation off with --validate=false
则我重新修改 kustomization.yaml 将其修改成:
commonLabels:
   deployment: hello
再次执行则显示成功:
configmap/the-map configured
service/the-service configured
deployment.apps/the-deployment configured
检查生成的pod:
kubectl get pods
由于通过 kubectl apply -k $DEMO_HOME/base 我们在默认连接的 minikube 测试环境创建了运行的pod,所以可以看到如下运行:
NAME                             READY   STATUS    RESTARTS   AGE
the-deployment-6df7fc786-247gp   1/1     Running   2          6d19h
the-deployment-6df7fc786-x4zpf   1/1     Running   2          6d19h
the-deployment-6df7fc786-zk2pw   1/1     Running   2          6d19h
备注
kubectl get pods 默认只显示 default namespace中的pod,所以需要注意自己的pod创建在哪个namespace中,如果没有查看到上述输出,则检查一下 kubectl 访问配置。
最终的base配置
base/deployment.yaml
 1apiVersion: apps/v1
 2kind: Deployment
 3metadata:
 4  name: the-deployment
 5spec:
 6  replicas: 3
 7  template:
 8    metadata:
 9      labels:
10        deployment: hello
11    spec:
12      containers:
13      - name: the-container
14        image: monopole/hello:1
15        command: ["/hello",
16                  "--port=8080",
17                  "--enableRiskyFeature=$(ENABLE_RISKY)"]
18        ports:
19        - containerPort: 8080
20        env:
21        - name: ALT_GREETING
22          valueFrom:
23            configMapKeyRef:
24              name: the-map
25              key: altGreeting
26        - name: ENABLE_RISKY
27          valueFrom:
28            configMapKeyRef:
29              name: the-map
30              key: enableRisky
base/configMap.yaml
1apiVersion: v1
2kind: ConfigMap
3metadata:
4  name: the-map
5data:
6  altGreeting: "Good Morning!"
7  enableRisky: "false"
base/service.yaml
 1kind: Service
 2apiVersion: v1
 3metadata:
 4  name: the-service
 5spec:
 6  selector:
 7    deployment: hello
 8  type: LoadBalancer
 9  ports:
10  - protocol: TCP
11    port: 8666
12    targetPort: 8080
base/kustomization.yaml
 1# Example configuration for the webserver
 2# at https://github.com/monopole/hello
 3#commonLabels:
 4#  app: hello
 5commonLabels:
 6  deployment: hello
 7
 8resources:
 9- deployment.yaml
10- service.yaml
11- configMap.yaml
overlays
持续集成 中,我们通常会创建一个模拟环境(staging)和一个生产环境(production) overlay:
staging环境激活production环境没有激活的一个有风险功能
production环境设置一个较高的副本数量
web服务器的集群变量设置不同
OVERLAYS=$DEMO_HOME/overlays
mkdir -p $OVERLAYS/staging
mkdir -p $OVERLAYS/production
staging环境
在和 base 并列的 overlay 目录下创建的 staging 子目录包含了所有 staging 环境用于覆盖公共 base 配置的内容。简单来说,就是 overlay 的优先级高于 base ,所有 overlay 中配置项只要能够在 base 中找到,就会覆盖 base 中配置值。
kustomization
在
staging目录下,定义一个新的使用不同标签的配置 -staging/kustomizaton.yaml
 1namePrefix: staging-
 2commonLabels:
 3  variant: staging
 4  org: acmeCorporation
 5commonAnnotations:
 6  note: Hello, I am staging!
 7bases:
 8- ../../base
 9patchesStrategicMerge:
10- map.yaml
Staging补丁
添加
configMap定制staging环境服务的消息,并且激活risky标记 -staging/map.yaml
1apiVersion: v1
2kind: ConfigMap
3metadata:
4  name: the-map
5data:
6  altGreeting: "Have a pineapple!"
7  enableRisky: "true"
production环境
kustomization
production/kustomiaztion.yaml
 1namePrefix: production-
 2commonLabels:
 3  variant: production
 4  org: acmeCorporation
 5commonAnnotations:
 6  note: Hello, I am production!
 7bases:
 8- ../../base
 9patchesStrategicMerge:
10- deployment.yaml
production补丁
production/deployment.yaml
1apiVersion: apps/v1
2kind: Deployment
3metadata:
4  name: the-deployment
5spec:
6  replicas: 10
对比overlays
现在的目录结构如下:
~/hello
 ├── base
 │   ├── configMap.yaml
 │   ├── deployment.yaml
 │   ├── kustomization.yaml
 │   └── service.yaml
 └── overlays
     ├── production
     │   ├── deployment.yaml
     │   └── kustomization.yaml
     └── staging
         ├── kustomization.yaml
         └── map.yaml
对比目录可以看到 staging 和 production 的差异:
diff \
  <(kustomize build $OVERLAYS/staging) \
  <(kustomize build $OVERLAYS/production) |\
  more
部署
通过以下独立命令可以检查资源设置输出:
kustomize build $OVERLAYS/staging

kustomize build $OVERLAYS/production
现在我们可以部署到kubernetes集群中:
kustomize build $OVERLAYS/staging |\
    kubectl apply -f -

kustomize build $OVERLAYS/production |\
    kubectl apply -f -
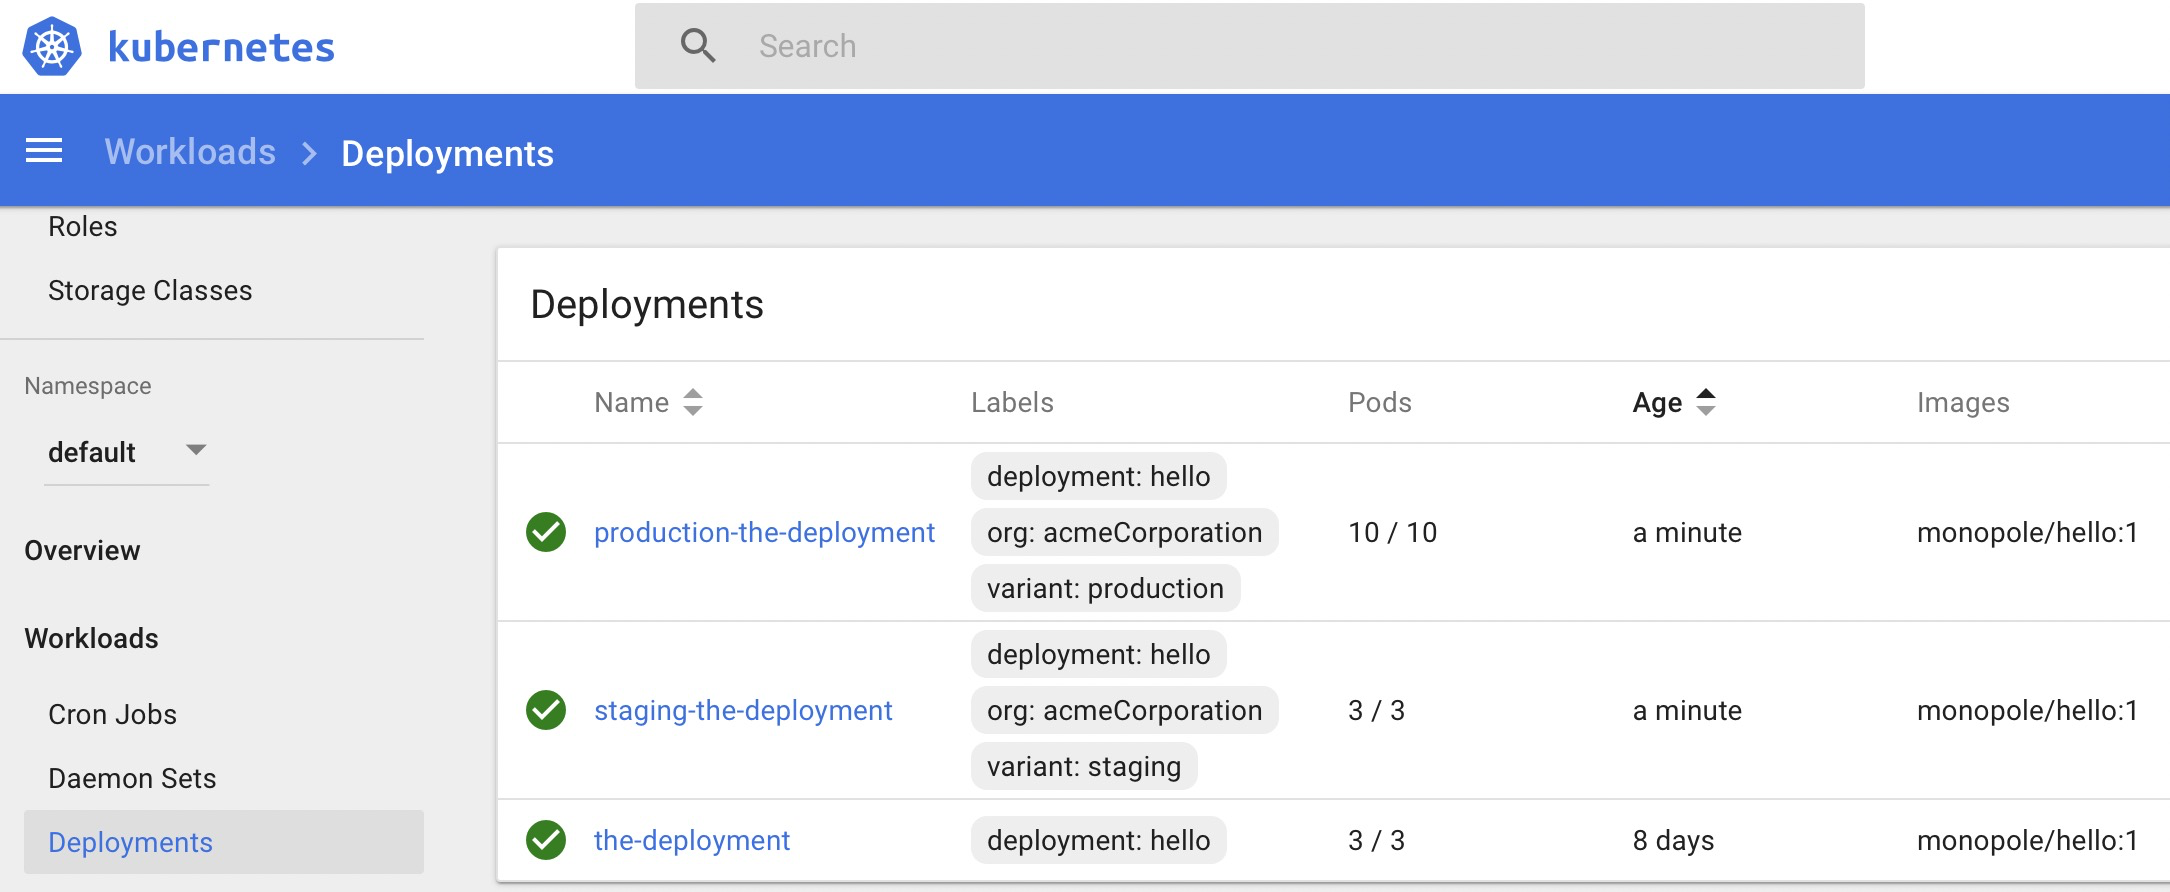
通过 Kubernetes仪表盘 我们观察部署可以看到针对不同环境

Figure 1: 创建staging和production环境的overlays的不同pod
通过
kubectl get pods可以看到系统中运行的这些pod:$ kubectl get pods NAME READY STATUS RESTARTS AGE production-the-deployment-79599bddf6-7db6n 1/1 Running 0 14m production-the-deployment-79599bddf6-g66cz 1/1 Running 0 14m production-the-deployment-79599bddf6-gbxlm 1/1 Running 0 14m production-the-deployment-79599bddf6-hwtzc 1/1 Running 0 14m production-the-deployment-79599bddf6-jjbsr 1/1 Running 0 14m production-the-deployment-79599bddf6-jqflw 1/1 Running 0 14m production-the-deployment-79599bddf6-kprtr 1/1 Running 0 14m production-the-deployment-79599bddf6-qfhsl 1/1 Running 0 14m production-the-deployment-79599bddf6-vdhtd 1/1 Running 0 14m production-the-deployment-79599bddf6-vx2bd 1/1 Running 0 14m staging-the-deployment-5549c68f4b-k27jb 1/1 Running 0 14m staging-the-deployment-5549c68f4b-tbnzt 1/1 Running 0 14m staging-the-deployment-5549c68f4b-vx42w 1/1 Running 0 14m the-deployment-6df7fc786-247gp 1/1 Running 2 8d the-deployment-6df7fc786-x4zpf 1/1 Running 2 8d the-deployment-6df7fc786-zk2pw 1/1 Running 2 8d